Moving Mailboxes with the Microsoft Exchange Mailbox Merge Wizard
The Exchange Task
Wizard is useful for moving a small number of mailboxes within the same
organization, but it isn’t designed to move mailboxes in bulk or to move
mailboxes across Exchange organizations. For these tasks, use the
Microsoft Exchange Mailbox Merge Wizard.
The Microsoft
Exchange Mailbox Merge Wizard is not installed by default with Exchange
Server 2003. You must copy Exmerge.exe and Exmerge.ini from the
installation CD to the \Exchsrvr\Bin folder on your Exchange server.
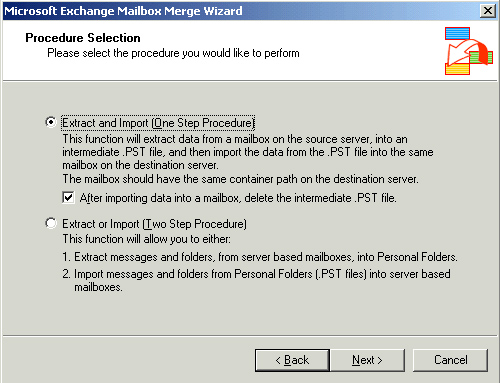
Once you do this, start Exmerge.exe. When you start the wizard and pass
the Welcome page, you are given the choice of a one-step or a two-step
merge process, as shown in Figure 25.
There are some
considerations when using the Mailbox Merge Wizard. The process exports
mailbox data out to personal storage files (.pst files), then imports
them into the same mailboxes on another server. In the process, the
Single Instance Storage feature of Exchange, where a message is stored
once and referenced by pointers to as many mailboxes as contain the
message, is lost. Each migrated mailbox will have a copy of every
message it contained, which can increase the size of the mailbox store
considerably.
1. | Select the Extract And Import (One-Step Procedure) option, and click Next to continue.
| 2. | Next, you are prompted to select a Source Server, as shown in Figure 26.
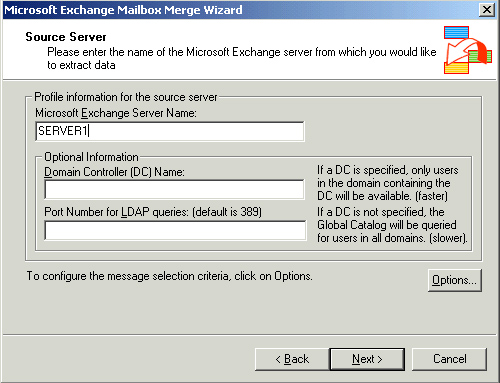
| 3. | You
can control the behavior of the mailbox merge procedure by clicking
Options after entering the source server name. You will be presented
with multiple pages that allow you to configure different aspects of the
merge.
| 4. | The options you can configure are as follows:
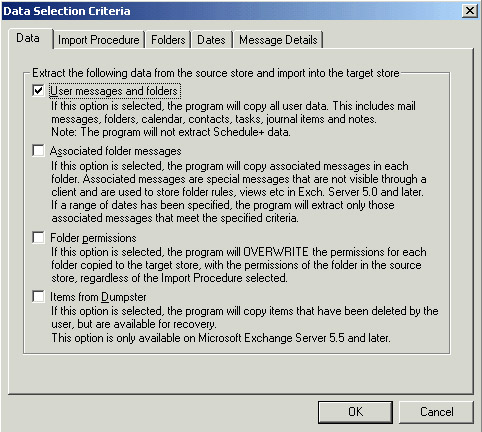
- Data— The Data page allows you to control how much data you migrate. The default setting, User Messages And Folders, shown in Figure 27,
migrates only user messages and folders. If you want to migrate
additional items, such as the user’s dumpster items (items held by the
Deleted Item Retention period) or folder permissions, you can select the
appropriate options.
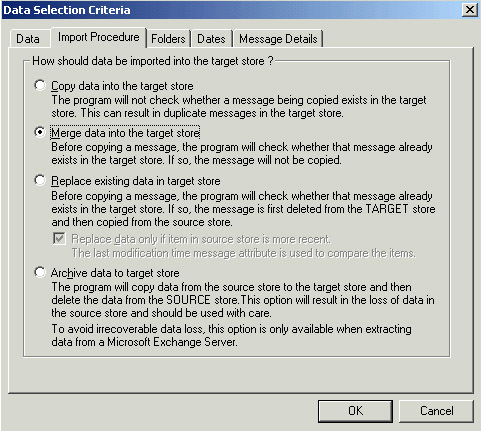
- Import Procedure— The Import Procedure page, shown in Figure 28,
allows you to define how the data should be written to the destination
mailbox store. You can copy the data to the target store (which could
create duplicate items), merge the data, replace existing data, or
archive the data (deletes it from the source store after copying).
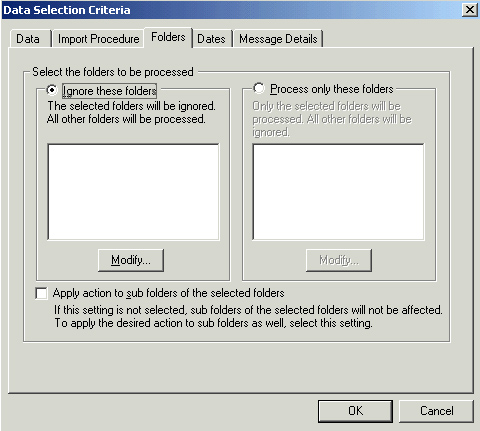
- Folders— The Folders page, shown in Figure 29,
allows you to configure what folders are processed in the migration. By
default, all folders in a mailbox are migrated, though you can choose
to limit the migration to specific folders or to exclude certain
folders.
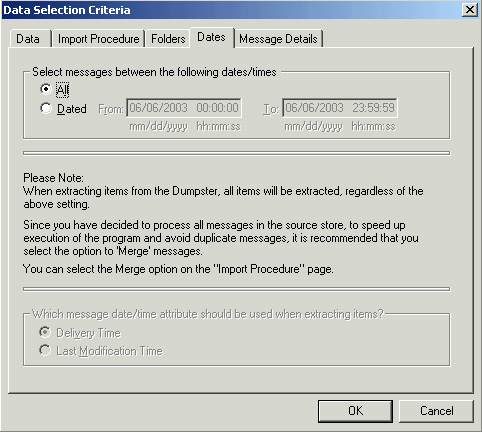
- Dates— On the Dates page, shown in Figure 30,
you can select messages between specific dates and times to be
migrated. This is useful if you have users who have years worth of
e-mail, tasks, and calendar items saved, and you wish to keep only items
dating back to a certain date. The default is to migrate everything,
regardless of date.
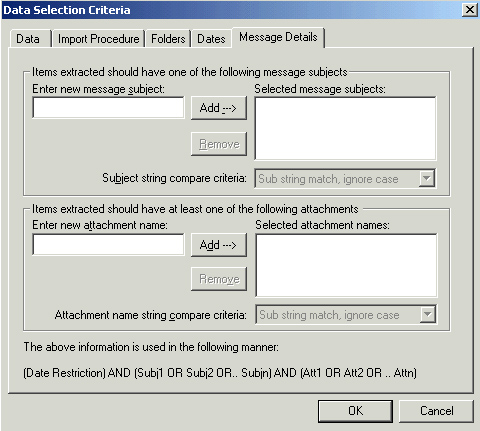
- Message Details— The Message Details page, shown in Figure 31,
allows you to extract items based on message subjects or attachment
names. This is especially useful if you are working with a very large
mailbox, and you want to extract only specific types of messages.
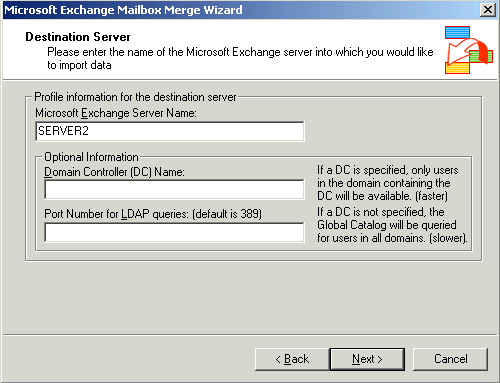
| 5. | After
configuring your options, click OK, and then click Next to continue the
wizard. This brings you to the Destination Server page, shown in Figure 32.
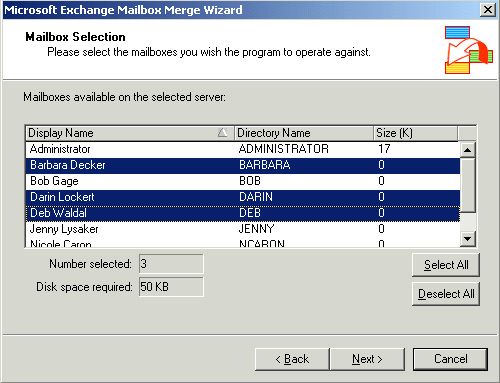
| 6. | Type
the name of the destination server for the migration, and then click
Next to continue the wizard. The Mailbox Selection page, shown in Figure 33, opens, and you can choose the mailboxes you want to migrate. Select the mailboxes you want to migrate, and then click Next.
| 7. | Next,
you are prompted to choose the default locale for the target mailboxes.
If your destination is in the same country, such as the United States,
then you probably have only a single locale in your Exchange
organization. If you are moving the mailboxes to a server in a different
locale, select the one that is appropriate from the drop-down list, and
then click Next.
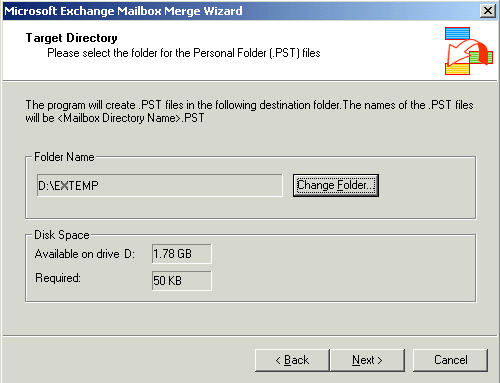
| 8. | Next,
choose a folder on the Exchange server to store the temporary .pst
files used during the migration process. When you select a folder, you
will see the amount of disk space required and how much space the drive
containing the selected folder contains, as shown in Figure 34.
| 9. | Before
the migration process begins, you will have the option to save the
settings for use at a later date. This is useful if you want to run the
migration later as part of a batch and not have to redefine all the
settings. After you decide whether to save your settings, click Next to
start the migration. A Process Status window will display, showing you
vital statistics about the migration, including the elapsed time and how
many successes and failures have occurred. When the operation
completes, you can click Finish to exit. If there were any errors, an
ExMerge.log file will be created in your \Exchsrvr\Bin folder. You can
view it to see what went wrong in the process. |
|